Ceramic Tile Installation
If laying ceramic tiles is totally new to you, “5 Steps to complete a successful ceramic tile installation” is a set of basic but important tips that will help you avoid making costly mistakes on your next bathroom or ceramic tile installation.
” Plan which Tile
” Shop around if you want to save
” Prepare the surface for a long-lasting job
” Lay the tiles
” Finishing touches
Plan which Tile
This step is often underestimated and sometimes even forgotten (can you believe it?). Planning your ceramic tile installation from A to Z is probably one of the most important steps for a smooth, easy going, and problem-free bathroom tile installation.
Some things to take into account are;
” Suitability of the tile
” Pattern /color of the tile
” Size of the tile
” Size of the area to be tiled. (This is important data that will be vital to know how much tile, grout, etc, you have to buy)
” Adhesive, mortar, or grout to suit your needs
Not all ceramic tile installations are the same, different tiling installations may require different mortar or grout. DO NOT feel shy about asking the suppliers for advice or help in calculating how much you need. They will gladly help you, as they are likely to make a sale.
Shop around if you want to save
This isn’t as difficult as the first step, however, when the budget is tight it can be tricky to find the right tile for the ceramic tile installation you want. You are going to have to make some compromises and so don’t get carried away by the beauty of some of the ceramic tiles. Prices can vary a lot between different tiles, so some end up rather expensive for only a few square meters.
Always shop around, it has never been easier. Just sit in front of the computer and use the Internet. Use local directories to find the suppliers close to you and pay them a visit.
Before making your final decision always check the chosen tile under different lights as the results can be surprisingly different.
Prepare the surface for a long-lasting job before laying the ceramic tiles
The surface to be tiled (floor, wall, or any other) will often need to be prepared, this can include work like filling, leveling, smoothing, priming, and sometimes waterproofing.
The right preparation will directly affect the lifespan of the ceramic tile installation. Unless you want to be tiling again soon, you want to get this right from the start.
This is probably the most important point to ensure a long-lasting tiling job. Don’t rush it.
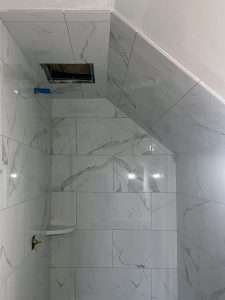
Laying the ceramic tiles safely
The technique of laying ceramic tiles is not especially difficult. It only takes a little bit of practice before anyone can easily master it. Clearing the room to be tiled before starting will help you to do the job safer and easier. Don’t forget to wear your safety goggles when cutting or chipping tiles.
Laying ceramic tiles can also be a bit messy, if you don’t want dust all over the house we suggest sealing the room you want to tile whenever possible. A large piece of plastic tacked to the door frame will do the job quite well.
Try not to allow any adhesive to get on your skin and never forget to read the manufacturer’s directions before even opening the tin. If some end up on you, just clean it with water as soon as possible. Even though tile adhesives aren’t usually abrasive, if you leave it for some time it may cause an allergic reaction.
Use a spirit level to help you with the depth & level of the tiles and spacers to maintain an even distance between them.
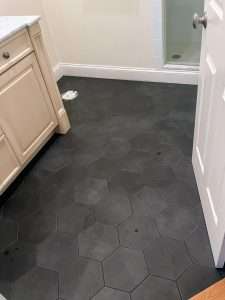
The finishing touches
Once the tile adhesive or mortar has cured (dried) and the tiles are firm and even, you can start with the finishing touches.
You’ll have to fill the spaces between tiles with grout making sure you don’t leave any gaps as these cause damp problems, in a shower for example.
The technique is very simple, use a rubber-faced trowel to spread the grout and a cotton cloth to clean the excess grout from the tiles afterward.
There are many different types of grouts; you’ll have to choose the right one depending on the surface and chosen tile.
Now that you have your ceramic tiles laid down, you only need to take care of them, usually, manufacturers provide information on taking care of their tiles and only minimal effort is required. Most household cleaning products will do the job well, if some particular stain is stubborn, there are many commercial stain removers, just make sure you use the right product for the right tile.
You are now closer to discovering how satisfying it can be to handle a tile installation yourself; just follow these 5 steps to get the best result.